Wicked Brownie

when working night shifts – it’s a given that hunger will strike at hours that are odd/ungodly…but hunger has to be fed!!! Our building cafe closes by midnight and we had to go all the way to another bldg to get something to eat. It was a coffee shop and the only thing they had at the hours we were hungry was wicked brownie. They actually serve it on a plate – with a slice of brownie and a scoop of vanilla ice cream on its side and chocolate fudge going all across the plate – binding the brownie and ice cream. Well when we ordered it for a take away – they use to layer it for us in a glass for easy take away :).  Just the fact that they use to layer it for take away – made me fall in love with this desert. The ice cream and brownie layered were DELICIOUS. This is such an easy desert to make and it is a guest pleaser – Here is the recipe….

I took the fudge brownie recipe from Martha Stewart’s website – Here is the link for the same. http://www.marthastewartweddings.com/223905/espresso-fudge-brownies. I halved the recipe and it gave me good 6 glasses of dessert plus some to eat all by itself. 🙂

When the brownies are ready – I let it cool for a while and then layered it vanilla ice cream. I crushed a few cookies and used it as a topping :).

Enjoy!

Tidali Dal

Dal Chawal back home was everyday food – for dinner. My mom makes different type of dal – for every weeknight and then a side of some vegetables along with rice. There are so many varieties of Dal (lentils) that everyday of the week you can have one and the good thing is they all taste different and you wont get bored of them. Well – If my Mom doesn’t make Dal for me – it is not an everyday food for me ;). I like adding vegetables when making dal – such as brocoli (yummy) or spinach or sometimes make a combination of different types of dal.  Tidali Dal as the name suggests is 3 different types of dals cooked together. (3 dals cooked together). This is mostly made at afternoons in my house as this tends to get a little heavy for a light dinner ;). So let’s get started….

This is what you need:
1/3 cup white gram beans (Urad Dal)
1/3 cup yellow lentils (toovar dal)
1/3 cup yellow split peas (channa dal) or you can also go with mung beans (moong dal)
1 medium onion – thinly sliced
2 tbsp – ginger garlic paste
2 tbsp – oil
1 tsp – turmeric powder
1 tsp – red chilly powder
1 tsp – coriander powder
1 tsp – garam masala powder
2 medium tomatoes – chopped
1 tsp – mango powder (optional) or 1 tbsp of lemon juice
1 tsp cumin seeds
2-3 dry red chillies crushed
salt to taste
2 tbsp of chopped Cilantro to garnish

This is how you make:
Step 1 – Take a vessel and wash all dals and then soak them for about 2-3 hours. Then using a pressure cooker – add Dal and 3 cups of water and pressure cook them for 3-4 whistles. Once the pressure cooker cools – open it and then mix the dals together. add 1 cup water and put it on low heat.
Step 2 – Now for tempering. Take a frying pan and on medium heat add 2 tbsp of oil. Then add cumin seeds and as soon as they crackle add onions. Cook for about 2-3 minutes.  Now add dry red chillies and then tomatoes – cook for another minute or so. keep sautéing them as the tomatoes will become pulpy. Then add ginger garlic paste and continue to saute.
Step 3 – Now add – turmeric powder, mango powder, chilli powder, garam masala powder, coriander powder and salt. saute for a 2-3 minutes till the oil comes to surface. Once you see oil at the surface of the pan – add this to the dal and mix well.
Step 4 – bring the dal to a boil and cilantro. switch off the heat – cover the cooker and let it rest for 5-10 mins.
Step 5 – Serve with rice – roti or just drink it like a soup.


Enjoy 🙂

Pasta – Desi style

This dish is one of Mom’s weekend dinner special. She knows we love this dish and prepares it at least 2 hours ahead of our dinner time – so that we could snack on it before sitting for dinner. Now that I have been in the US for about 2 years… it feels funny to have Pasta made at home in a very non italian way. But all the pasta set aside…nothing taste better than My Moms homemade Pasta. This is my Mom’s macaroni recipe – I had shelled pasta and used the same for this recipe.

This is what you need:
2 cups shell pasta – boiled
1 medium onion – finely chopped
2 medium tomatoes – finely chopped
1 tablespoon ginger garlic paste
1/2 teaspoon cumin seeds
2-3 dry red chillies
2 teaspoon – coriander powder
1/2 teaspoon – dry mango powder
1/2 teaspoon – red chilli powder
1/2 teaspoon – turmeric powder
1/4 cup – shredded carrot (optional)
1/4 cup – bell pepper strips (optional)
2-3 tablespoons cilantro
1/2 cup hot water
salt to taste
2 tablespoons oil

This is how you make:
Step 1 – take a non-stick sauce pan. On medium flame – heat oil, add cumin seeds, red chilli and onion. saute onion for about a minute and add salt. Add ginger garlic paste and saute for another minute. Now add tomatoes – coriander powder, chilli powder, turmeric powder, dry mango powder, shredded carrot and bell peppers. Let them all cook together till tomatoes become pulpy.
Step 2 – Once the tomatoes are pulpy – increase the heat and stir for about a minute or so mixing all the ingredients together. Now add hot water and bring it to a boil (Adding hot water will only quicken the cooking process…adding cold water or water at room temperature – slows cooking time.)
Step 3 – Bring it back to medium heat – Now add the pasta and gently stir – mixing it will the all the ingredients in the pan. Add cilantro – cover and let it cook for 5 mins. Taste and check for doneness. Adjust spices accordingly and serve.

All of us in the family had our own way of eating – we used to eat it with rice OR with Dal, Chawal (rice) OR with roti.

I was the early snacker and this is how I ate – 😀

I am sending this recipe to Lisa’s Kitchen – http://foodandspice.blogspot.com/2012/02/celebration-of-indian-food-and-giveaway.html – Come join and celebrate! 🙂

Chicken Curry

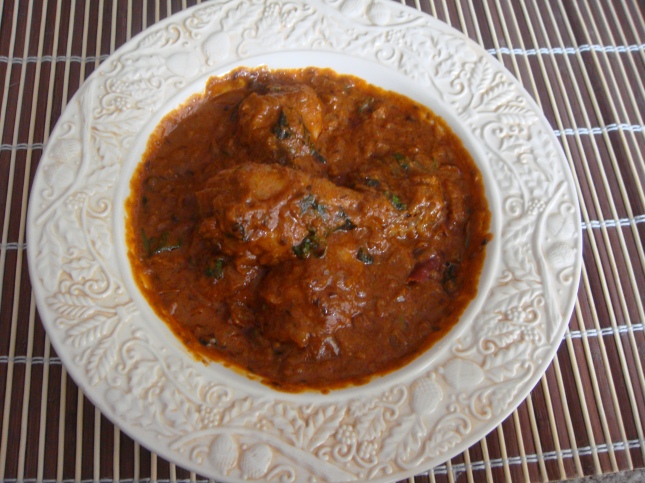
Sometimes I feel like experimenting with my basic recipes – to see if changing an ingredient brings in a difference in taste? texture??. And then during the process of working with changing ingredients – it helps me learn what works and what else can be tried :). This time It was the absence of raw tomatoes that made me go for the tin of Hunts Tomato paste and work on my basic recipe (I just keep 1 can – before I get a chance to do my grocery – for just incase I need it moments). The tomatoes really worked and gave me a very nice smooth and tasty gravy!

Recipe source: This is a basic home recipe – no frills to it. I am sure it is out there in many other houses. 🙂


This is what you need:

– 2 tablespoons oil
– 5-6 chicken drumsticks
– 2 tablespoons tomato paste – (this one really works – if you want to give it a try) – if not then 2 medium-sized tomatoes – roughly chopped
– 1 tablespoon ginger garlic paste
– 1 medium onion – thinly chopped
– 1 teaspoon cumin seeds
– 2 green chillies (slit into half)
– 2 dry red chillies (slit into half)
– 1/2 teaspoon turmeric powder
– 1/2 teaspoon red chili powder
– 1 teaspoon coriander powder
– 1/2 teaspoon garam masala powder
– 1/2 cup hot water
– 1/2 cup fresh cream/sour cream/milk/yoghurt
– 1/4 cup mint/cilantro leaves
– salt to taste

This is how you make:
Step 1: Take a medium-sized sauce pan (Non stick is good). On medium heat – heat oil and add cumin seeds/green chillies and red chillies. Add onions and saute till onions just start to turn brown – then add ginger garlic paste and saute for about 30 seconds. Now add the tomato paste and saute till for about 2-3 mins.
Step 2 – Now add: Turmeric powder, coriander powder, garam masala powder, red chilli powder. saute till all these are mixed well with onions and tomatoes.
Step 3: Now add hot water and cook till the water boils (this really should be about a minute or so – since we are adding hot water). Now add salt. Do a taste test here and adjust as needed.
Step 4: Fold in Chicken and let it cook till chicken is tender. keep stirring occasionally.
Step 5: Once the chicken is tender. Add fresh cream and stir it on high flame – till it is completely incorporated. Now add coriander and fresh mint. switch off the heat. cover and let it rest for about 5-10 mins.

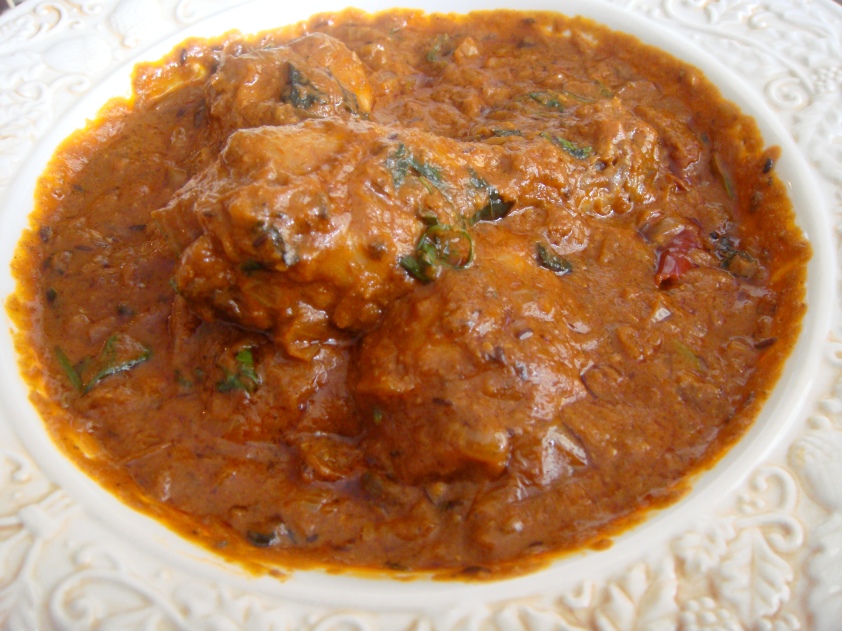
I really really loved the color and the texture of this gravy. Serve it with plain rice/roti or naan.
I am a fresh ingredients user – but sometimes it doesn’t hurt to use canned ingredients… all the more a good reason if they turn out this good. 🙂

If you are a vegetarian – you can use choice of any of your favorite vegetables or Tofu??

Enjoy! Have Fun….

Egg Dosa

Cooking with raw ingredients is fun – but cooking using “left overs” is an art ;). I love using left overs and get creative with them… don’t like to eat the same meal twice in less than 24 hours. If the left over is plain rice – its super fun to turn it into fried rice, lemon rice etc etc with it. But this time – I had dosas as left overs and this has never been the case before. We usually eat them as and when we make them. So it was time to be creative with them as our breakfast. So the genius in me got thinking and came up with an idea – scramble the eggs and mix with dosa…yes the ideas kept coming and my mind had started working…the hands opened the fridge and the ingredients started chopping….

Here is what you need:
3 medium dosas
2 eggs
2 tablespoons of oil
1 medium onion (roughly chopped)
1 medium tomato (roughly chopped)
1 teaspoon cumin seeds
1 teaspoon ginger garlic paste
1/2 teaspoon turmeric powder
1/2 teaspoons coriander powder
1/2 teaspoon red chili powder
few curry leaves
1-2 slit green chillies
1 whole red chili (optional)
1 teaspoon garam masala
salt to taste
coriander for garnish
1/4 cup of hot water

This is how you make:
Step 1: On medium heat a non-stick pan with 2 tablespoons of oil. Add cumin seeds, curry leaves, green chillies, red chili and add onions. saute till onions are transparent.
Step 2: Add ginger garlic paste and saute for a minute. Now add tomatoes, turmeric powder, garam masala, coriander powder, red chilly powder and salt to taste. Cook till tomatoes are pulpy.
Step 3: Now move this mixture to a corner of this pan and break 2 eggs in the pan on one side. (You can also break the eggs on the mixture)  I do this so that the eggs can cook a bit and then mix them altogether.
Step 4: Once the egg mixture is ready. Tear the dosas into medium pieces and add it to the egg mixture and cook on medium high heat for a minute or so.
Step 5: Add water and let it cook on medium heat till water is completely absorbed. (You are basically doing this to soften the dosa. and we are adding hot water so that the cooking process does not slow down. adding cold water will slow down the cooking process and make the scrambled eggs tasteless.
Step 6: Garnish with fresh coriander and serve…

P.S. – Dont have leftovers – then go ahead and try it with bread or even chapati.

Have fun – Enjoy Cooking.

I am sending this recipe to – “http://www.simplysensationalfood.com/2012/01/event-announcement-lets-cook-with-left.html

Doodh Peda – Milk Fudge

This “Sweet” is all good milk – made with real milk, milk powder and milk solids (homemade cottage cheese/chenna). I have created it many times – for dessert, gifting or just snacking (sometimes ;)). This recipe has all the goodness of milk and is very tasty…

Recipe Source – Manjula’s Kitchen (I have always followed this recipe – and it has always turned out perfect)

This is what you need:
1  cup homemade cottage cheese (chenna/paneer)
1/3 cup milk powder
1/3 cup milk 1/2  cup sugar
3  tablespoon unsalted butter
1/4 teaspoon cardamom powder
1-2 tablespoons of pistachios for garnish

This is how you make homemade cottage cheese – Bring 1 litre of whole milk to a boil and add 2-3 tablespoons of lime juice – stir gently and let it curdle – Drain it in a muslin cloth and wash the cheese – removing traces of lemon from it. Remove excess water and set it aside.

This is how you make Peda:
Step 1:Heat the frying pan on medium. Add butter and let it melt.
Step 2:Next add milk, milk powder, and paneer. Mix it well.
Step 3:Cook mixture on medium heat stirring continuously until mixture starts leaving the sides of the frying pan and becomes like dough. This should take about 12 minutes.
Step 4:Transfer the khoya into a bowl and let it cool off until khoya becomes just lukewarm.
Step 5:Mix the sugar and cardamom powder into the khoya and knead it for about a minute until every thing blends together and become soft dough. Note: if you mix the sugar while khoya is hot that will make pedas soft.
Step 6:Divide the mix into about 20 equal parts and roll them into round balls. Lightly press it down so it looks like small patty.
Step 7:Put few pieces of sliced pistachios on every peda.

Caution: Though this is easy – be “extremely” careful when you are working on preparing the dough with milk,milk powder and cottage cheese. You will have to continuously moderate the heat from high to medium. Do not leave the pan unattended at any time – the mixture will burn quickly if you don’t stir it continuously. So dedicate your time and attention – they will turn out perfect 🙂

Egg Curry

The ‘Incredible’ egg is used by many of us in many many different ways – omelette, scrambled, boiled etc etc. For breakfast, baking, lunch, dinner and it really in true sense of the word is very VERSATILE. Don’t remember a day when the fridge was out of eggs and maybe that’s why they came to rescue when the fridge was out of supplies. So we were out of all the vegetables and had not done our grocery shopping for the week – the ‘Incredible’ egg made a tasty meal.

This is what you need:
4 boiled eggs – Deshelled and cut into half (horizontally or vertically ;))
1 tablespoon ginger garlic paste
1/2 cup sour cream
1/2 tablespoon garam masala powder
Salt to taste
1/2 teaspoon turmeric powder
1/2 teaspoon red chilli powder
1/2 teaspoon cumin powder
1 medium onion thinly chopped
1- 1/2 tomatoes thinly chopped
2 slit green chillies
2 dry red chillies
1 teaspoon cumin seeds
1-1/2 teaspoon kasoori methi (dry fenugreek leaves)
1/2 cup of water

This is how you make:

Step 1: Heat 2 tablespoons of oil in a sauce pan. Saute cumin seeds, onions, green chillies and red chilies till onions turn translucent. Add tomatoes, salt to taste, turmeric powder, cumin powder, ginger garlic paste and cook till tomatoes turn pulpy. This should take about 7- 10 minutes on medium heat.

Step 3: Now add in the sour cream and bring it to a boil and stir for about a minute on high heat. (This lets the sour cream cook with the onion and tomatoes)

Step 4: Now bring it back to medium heat and add water – let cook for about 5 mins. At this point, check for consistency of the gravy – it should be creamy and smooth. If it is watery cook for some more time.

Step 5: Once the consistency is creamy – add in garam masala powder and crushed kasoori methi. Bring it to a boil – add eggs. Switch of the heat and cover the sauce pan with the lid for about 5-10 mins. this will let all the flavors settle and come together.

This can be eaten and enjoyed with roti, naan, steamed rice or even with sliced bread.


Enjoy the protein 😉 – Try it and let me know if you like it.

Sending this to Jingle all the way event at http://myedibles.blogspot.com/2011/11/jingle-all-way-event-announcement.html

Thumbprint Cookies – with Chocolate Ganache

Let the holiday baking begin!!! I love baking from the scratch and it really is very satisfying to see mixing ingredients coming together in the oven to form a tasty bite :). What I like most about thumbprint cookies is the extra step they call for where you indent with your thumb – how much more personal can you get? :). leaving an impression in the cookie and then filling it with your choice of preserve, chocolate or/and caramel etc…etc… These are really good for holiday gifting and the simple variations that they have are amazing. I “googled” and found a ton of recipes on the web – check out Martha Stewart’s website, she has at least a dozen of them on her site. I chose this one from her “Hazelnut Thumbprint” and went about with my own variation.

This is what you need:
1 stick unsalted softened butter (1/2 cup)
– 1/2 cup plus 2 tablespoons sugar
– 1 large egg, separated, each part lightly beaten
– 1 teaspoon pure vanilla extract
– 1 1/4 cups all-purpose flour
– 1/8 teaspoon coarse salt
– 1/2 cup toasted silvered almonds, ground
– 1/2 cup chocolate ganache for the filling

This is how you make:
Step 1: Preheat oven to 325 degrees. Put butter and 1/2 cup sugar in the bowl of an electric mixer ; mix on medium speed until light and fluffy, this should take about 2-3 mins. Now add egg yolk and vanilla, and mix well. Reduce speed to low and  add flour and salt, and mix until just combined.
Step 2: Refrigerate dough for 30 mins to 2 hours. ( you are basically doing this to bring the dough together if it is very soft – tip courtesy: http://www.joyofbaking.com/ThumbprintCookies.html)
Step 3: Stir together toasted almonds and remaining 2 tablespoons sugar in a small bowl.
Step 4: Roll dough into 1-inch balls; dip balls in egg white, then in almond-sugar mixture. Space 1 inch apart on baking sheets lined with parchment paper. Press down center of each ball with your thumb. Bake for 10 minutes. Remove from oven; press down centers again with the end of a wooden spoon. Return to oven. Bake cookies until golden brown, 8 to 10 minutes more. Let cool slightly on sheets on wire racks. Fill each center with chocolate ganache.

Ganache Recipe:
Step 1: Take a sauce pan on low heat and bring 1/2 cup of heavy whip cream to a boil and then stir in 2 tablespoons of milk chocolate (adjust sugar as needed).
Step 2: Add in coffee or coffee liquor (optional)
step 3: cool and use it as a filling for the thumbprint cookies

This recipe made 15 delicious cookies and we have just about 2 left 🙂 (My first cookies for the Holidays…)
Here is the link to Martha Stewart’s collection http://www.marthastewart.com/search/apachesolr_search/Thumbprint.

Carpe Diem!

I am sending this recipe for the holiday recipe exchange – Come join the fun at the My Baking Addiction and GoodLife Eats Holiday Recipe Swap sponsored by OXO.

AND also to Jingle all the way event at http://myedibles.blogspot.com/2011/11/jingle-all-way-event-announcement.html

AND at Let’s bake and be merry

Butter Paneer Masala

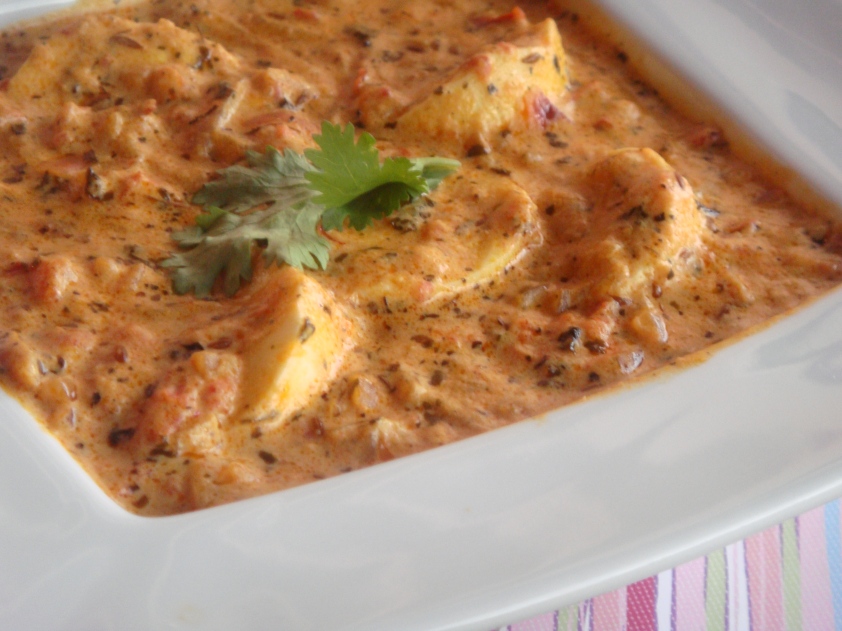
As long as or as far as my memory goes – this has been my forever favorite restaurant dish. My visits to Indian restaurants were well spent on ordering and eating this dish. A super creamy tomato based gravy prepared in butter with cubes of paneer (cottage cheese) – served with naan (Indian bread) or just plain rice. This gravy is very very versatile…once it is ready- it accommodates grilled chicken,lightly sautéed potatoes, or choice of your grilled veggies, tofu etc etc. I like to add a few more veggies to my dish in addition to paneer. Now that I have learnt how to make it at home, it’s a home favorite than a restaurant favorite 🙂

Recipe source: This is generously adapted recipe from Chef Harpal Singh. His tip on cooking tomatoes and then puree them eliminates the process of adding artificial orange color to give a rich color to this dish.

This is what you need:
5-6 medium tomatoes – roughly chopped
20 cubed of paneer -1/4inch cubes (cottage cheese – found in Indian grocery store)
1 medium bell pepper (cut into cubes)
1 medium onion (cut into cubes)
3 tablespoons of chopped garlic(roughly)
1/2 teaspoon cardamom powder
1 tablespoon garam masala
3 tablespoons oil
4 tablespoons of unsalted butter
salt to taste
1-2 tablespoon of red chilli powder
1 tablespoon kasoori methi (dry fenugreek leaves – found in Indian grocery store)
1/2 cup sour cream
1 tablespoon ginger paste
2 tablespoons honey (optional)
This is how you make:
– Heat a frying pan on medium heat – add 1 tablespoon of oil and saute onion and bell pepper for a minute and set aside.
– Now take a sauce pan on medium heat – add 1 tablespoon of oil and 2 tablespoons of butter – add garlic and saute it for about a minute and then add the tomatoes, cardamom powder and saute them on high heat for a minute or so and then bring them on medium heat and cover. occasionally stir it and then cover again till tomatoes become pulpy. This should take about 7-10 mins. Remove from the heat and let it cool. Now blend it to a fine puree. Strain this puree into a mixing bowl. This will separate the tomato skin leaving a silky puree in the mixing bowl.
– Now heat the sauce pan again on medium with 1 tablespoon oil and 2 tablespoons of butter – add ginger paste and saute for about a minute. Add the tomato puree and bring it to a boil.  At this point, add salt to taste, red chilli powder, garam masala powder and reduce the heat and let it simmer for about 5-10 mins – Now add the sour cream and let it cook for about 5 more mins. occasionally stirring it. Now bring it to a boil just once more and then add onions, bell pepper and Cottage cheese. Also crush the kasoori methi and it to the dish.
– Taste to check spices and salt and adjust accordingly. If you find it tart then add honey to balance the flavors. You can try adding sugar also to balance the flavors but honey brings the shine to the dish.
Switch off the heat and cover the sauce pan for about 10-15 mins. This lets everything come together and settle. Then it is ready to eat…
– Serve with any type of Indian bread or just plain white rice.


Try it – Enjoy!

Tip: Incase you are wondering why we are using oil and butter – as per chef Harpal, this avoids the butter from getting brown.

I am sending this recipe to http://foodandspice.blogspot.com/2011/11/celebration-of-indian-food-and-giveaway.html – let’s celebrate Indian food…

AND

I am sending this to recipe to My Baking Addiction and GoodLife Eats Holiday Recipe Swap sponsored by Kerrygold.

Almond and cream cheese pound cake…

Cream cheese in pound cake? yeah.. very very healthy 😉 (maybe not) – and very tasty. This september and October, we made a few trips to Wisconsin to meet our friends. It’s during one of these trips that I had a sugar high and bought this cake from a local gas station – it sure was tasty but way too sweet for me. I knew for sure that I had to make this at home and found a recipe on food.com. It’s a pound cake and I had to make it! I liked everything about this recipe – even the almonds that come in the way — 🙂

This is what you need:
1/2 cup of butter
4 oz cream cheese
1 and/2 cup of sugar
1 and 1/2 cup of all purpose flour
3 eggs
1/2 teaspoon baking powder
1 teaspoon vanilla extract
1/2 cup of almonds – divided


This is how you make: Steps: –
Preheat oven to 325* – Generously spray a loaf pan with non stick cooking spray – sprinkle the insides of the pan with a qtr cup of almonds.
In a mixing bowl cream butter and sugar until blended smooth. Add cream cheese and blend till smooth and fluffy, about 2-3 minutes. – Now add eggs one at a time, and keep beating till they incorporate in the batter. Add the flour, vanilla extract and a qtr cup of almonds and beat for about 2-3 mins. – Pour into the loaf pan. Bake at 325*F for 1 hour . Check for doneness at 1 hour. A toothpick inserted into center of cake will come out clean.


This was very light and tasty… the texture is super soft. I will make it again and maybe toast the almonds next time – hmmmmmm

I am sending this recipe for the Holiday exchange – if you happen to read this post… Come join the fun at the My Baking Addiction and GoodLife Eats Holiday Recipe Swap sponsored by Chicago Metallic

AND
Food of the Month – Contest hosted by Amy

Enjoy!

Lassi with Fresh Herbs – Spiced Yoghurt Drink

This drink is easy to make, refreshing to drink and has a lot of health benefits coming from it. It helps digestion, stabilizes the immune system and is a very good cooling agent. My mom makes this everyday during summer – and we have it before and after lunch. This drink is particularly good for Indian summer but for me it’s an all time drink… Here is my version of this drink.

This is what you need:
1/2 cup of plain yoghurt (Non-fat works too)
12-15 mint leaves
a small bunch of cilantro leaves
a small piece of ginger (like less than 1/4inch)
1/4 teaspoon roasted cumin powder
1/4 teaspoon black pepper powder salt to taste
1/4 teaspoon chat masala – found in indian grocery store (optional – if you are using this then omit using cumin powder and black pepper powder)
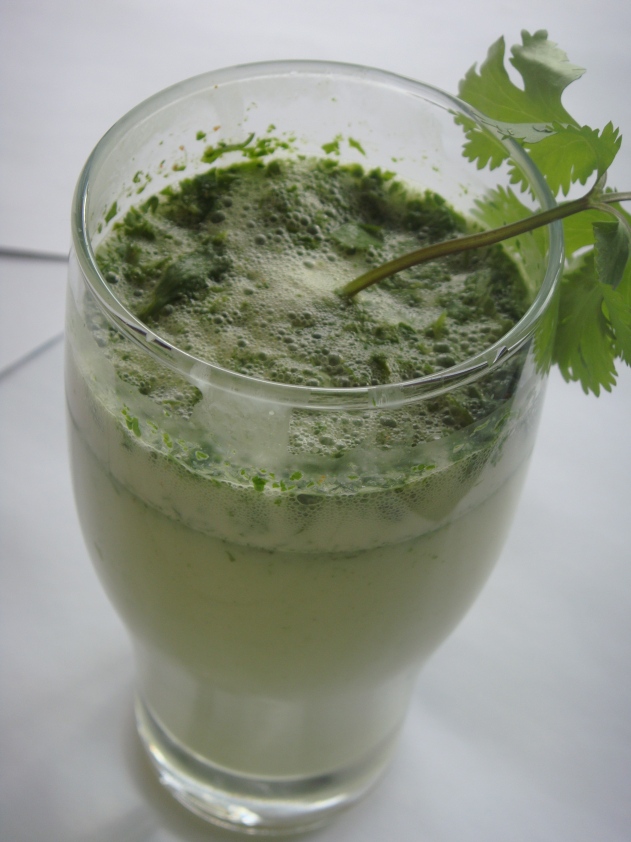
3/5th cup of water This is how you make: Take all the ingredients except water and blend it in a blender for about 1 minute. Now add water and blend it again for a few seconds. adjust salt as needed.
If you like drinking it as is – that is with a bit of ginger and some leaves coming in the way – then go for it.
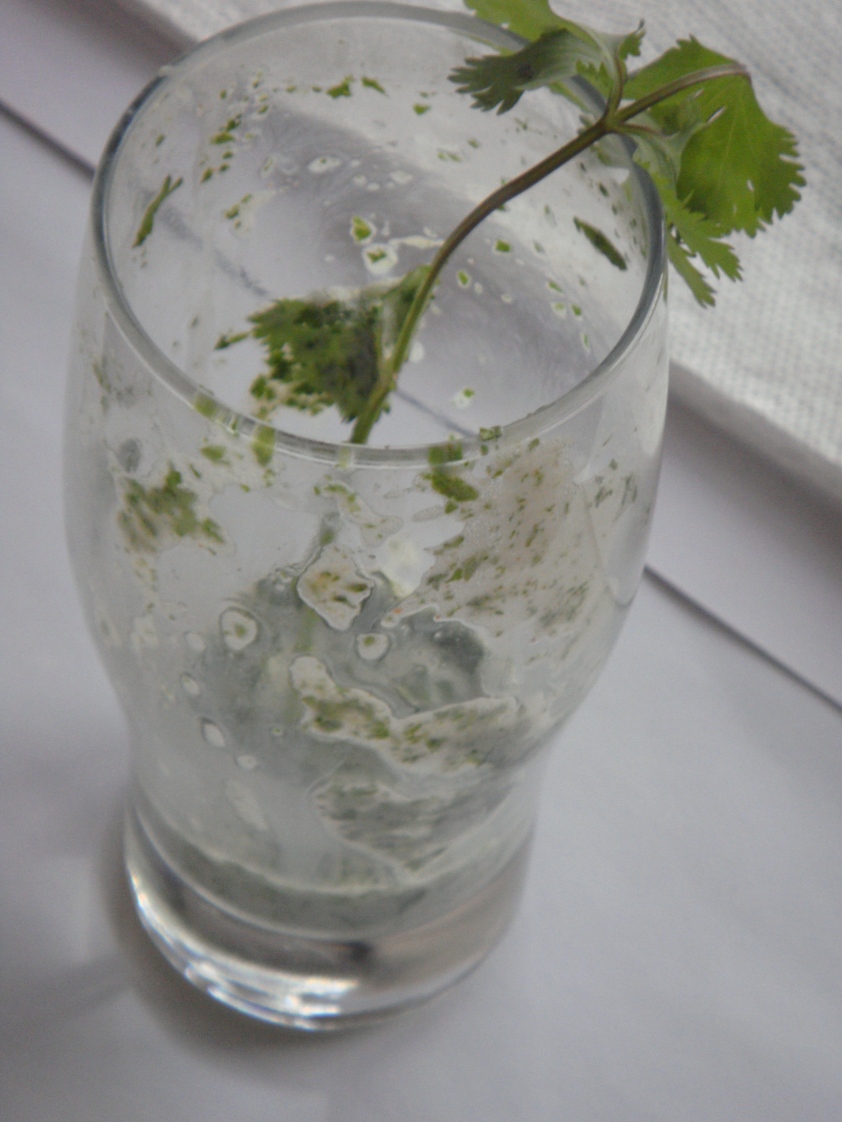
If not then just filter it out and drink… (don’t forget to pour it in a glass before drinking ;))


I like it as is and drink it as often as possible.
Enjoy!
I am sending this spiced yoghurt drink at http://www.renbehan.com/2012/01/family-friendly-fridays-new-linky-up-on-fabulicious-food-january.html

AND

Aimee’s Breakfast Club – January Detox, originally started by Helen.

Coconut Berfee


This is one of my absolute favorite Indian sweets. Its coconut fudge called berfee (pronounced as Ber (as in Berlin) and fee = BerFee) in India. My Aunt has been making this at home since ages for all the festivals and occasions we celebrate back home. There are so many of us in the family that love this sweet – that she ends up making this for us on every occasion we meet (makes me nostalgic now). So when I thought of making this at home – I had all the lovely memories running through my mind. I made my own version with what was available at home and I am sure she would have been proud of me – had she been here to taste this 🙂

Recipe inspiration – My Aunt 🙂

This is what you need:
– 1 cup sugar
– 1 cup dry coconut powder
– 1 cup fresh homemade cottage cheese (you just need a sauce pan, 1 litre whole milk, 2-3 tablespoons of lime juice/lemon juice/vinegar and have fresh cottage cheese at home!)
– 1 teaspoon cardamom powder
– 4 tablespoons of milk powder
– 2 tablespoons silvered almonds

This is how you make homemade cottage cheese
Bring 1 litre of whole milk to a boil and add 2-3 tablespoons of lime juice – stir gently and let it curdle
– Drain it in a muslin cloth and wash the cheese – removing traces of lemon from it. Remove excess water and set it aside.

This is how you make Coconut Berfee
In a heavy bottomed shallow pan on medium heat – mix sugar and coconut for 5 mins. Now reduce the heat to low and stir every 2-3 mins for about 20 mins. Remove from heat and set it aside
– Now in a sauce pan on medium heat
– Add 2 tablespoons of clarified butter and add cottage cheese. Stir for about a minute and add the coconut and sugar mixture.
– Add cardamom powder and milk powder.
– Stir for about 3-4 minuted…till everything comes together.
– Grease a 8X8 brownie pan and transfer mixture in this pan. Press down the mixture evenly and garnish with silvered almonds.
– Let it set for about 2-3 hours.
– Cut in square or rectangle or triangle or any any shape you’d like and eat….

Sending an Indian recipe for a change to the holiday recipe exchange at My Baking Addiction and GoodLife Eats Holiday Recipe Swap sponsored by Spice Islands.” 

Stretch Bread with GMC filling

 baking bread at home is such an awesome feeling…the dough reacting with yeast and doubling itself and so soft to touch – the dough was behaving just as the recipe was asking it to do. Baking with yeast for some reason is scary – the temperature of water needs to be right and the yeast has to be whisked right (this really makes me nervous – this step has led to a couple of failures before! shhhhh). This recipe has been bookmarked since a year and now that I am baking more frequently than before – I thought lets give it a TRY and see where it goes. It’s a basic flatbread recipe with Garlic, Mayo and Cheese filling – I love love love garlic and used it as a filling inside the flatbread rather than applying it on top of the flatbread as the original recipe was calling for – just for fun :). Today was the day – all was happening as per the recipe – so let’s get started 🙂

Recipe source – A passion for baking (by Marcy Goldman)

This is what you need:
For the Dough
1 cup warm water (100*F to 110*F) – Very Very IMPORTANT! 🙂
3/4 teaspoon rapid rise yeast
2 teaspoons sugar
2 cups bread flour
1/4 teaspoon salt

For the Garlic Mayo and Cheese (GMC) filling
6 cloves of garlic – finely minced
1/2 teaspoon salt
2 tablespoons mayonnaise
1/2 cup grated cheese (Parmesan or Mozzarella)
6-7 black peppercorns
12-15 basil leaves
1/2 teaspoon italian seasoning
2-3 tablespoons of olive oil
garlic powder (optional)

This is how you make
Line a large baking sheet with parchment paper and drizzle with olive oil.
– In a mixer bowl – whisk water and yeast together and leave it aside for 2-3 minutes. Briskly whisk in salt,sugar and most of the flour to form a soft dough. I kneaded with my hands for about 5-6 minutes adding more flour as necessary till the dough was resilient but not tough (alternatively – you use can knead with the dough hook using a stand mixer for about 5-6 minutes). knead it with some olive oil in and then cover the mixing bowl and let dough rise until double in size – this will take about 2-3 hours.
– Afte 2-3 hours, deflate the dough and knead it gently for less than a minute and cover it again.
– Now lets prepare the filling – (you can also use this as a topping – I was just being adventurous :))
      – Using a mortar and pestle, mash garlic,peppercorns,basil leaves, garlic powder to a fine paste. Remove to a bowl. Now fold in mayonnaise, grated cheese and seasoning and some oil.
– Deflate the dough on your workarea and stretch it a long oval (18X8 inches). Place on the prepared baking sheet and using a spoon, spread the filling over half of the dough – leaving about an inch of space from the edge (this will make it easy to fold the dough).
Now fold the other half of the dough on top of the filled part and press the edges – basically seal the filling.
 This is how it should look like. Drizzle olive oil – some grated cheese and italian seasoning.
– Preheat oven to 375* and bake bread for 30 minutes until golden brown and crisp on outside.

– Let cool slightly and slice into sticks – serve with marinara sauce or cream cheese or just as is.
I liked it and husband complimented saying “Good Job” – so I guess there will be a second time for this one soon – maybe with a different filling? 🙂 Yes – will follow the steps with the yeast – but will experiment with different variations to the filling.

On a different note – I am happy that I have started participating in the recipe exchange for this holiday – the different themes are making me experiment different aspects of baking 🙂 and so far its been fun fun fun…

Come join the fun at the My Baking Addiction and GoodLife Eats Holiday Recipe Swap sponsored by Red Star Yeast.

AND also sending it to Serve it baked-savory by Krithi, and Denny

Carpe diem.

Paneer Tikka

Chop – check
Marinate – check
Grill – check
Eat – check
Eat more??? check 🙂

That is how easy this appetizer is. It is not heavy…lightly flavored yoghurt based marination and mildly spicy with a touch of smoky flavor… yummmm!!! It really is dependent on the flavors that the marinade  is made of – I  tried quite a few paneer tikka recipies but will stick to this one as it is a chef’s recipe giving away tips that makes it restaurant style. This recipe has that smoky flavor to it – that makes me like it in first place and when this recipe promised it…I just had to try it and it did live up to its promise. I found this recipe on YouTube – it’s Chef Harpal Singh’s recipe.

This is what you need:
1/2 cup of yoghurt – whisked
Cottage cheese (Paneer) – about 20-25 (1/4 inch cubes)
1 Green Capsicum – cut into cubes 
1 Medium Onion – cut into cubes
1 teaspoon carom seeds
1 tablespoon gram flour
2 tablespoons Mustard oil
1 tablespoon ginger garlic paste
salt to taste
1/2 teaspoon garam masala powder
1/2 teaspoon chaat masala powder
1 teaspoon lime juice
butter for basting

This is how you make:
– Heat oil in a pan. add carom seeds and add gram flour – roast them till they emit a fragrant smoky aroma (this should be taking a minute or less on medium to low heat). remove from heat and let it cool. Transfer it to a mixing bowl. Add yoghurt and whisk till incorporated in yoghurt.
– Add ginger garlic paste, garam masala powder, lime juice and salt. whisk well to make a batter.
– Add paneer , capsicum and onion to the marinade and set aside for an hour.
– I grilled them over an open Panini griddle on 350* – for a total of 5 minutes .. till they turned light golden – occasionally basting them with butter.
– Once they were done – I arranged them on a fancy wooden picks and sprinkled chaat masala on them and some lime juice.
– Then I served them with a choice of ketchup and some salsa. This actually goes very well with mint chutney (I had no time that day).

My colleague – now one of my very good friends..came home for the first time and finished all of these!!! and went back with this recipe. I love this recipe for more than one reason – the same recipe becomes a main dish, when we prepare onion tomato gravy and add the grilled cottage cheese, capsicum and onion to it…. that will be in the next post… for now enjoy it as an appetizer!

Sour Cream Pound Cake

 I love pound cakes and brownies to an extent that it is always a battle for me to choose between the TWO! I love them — really really love brownies and pound cakes or pound cakes and brownies. Since I started blogging – it’s all the more a challenge as there are a TON of awesome recipes on the web with simple variations to each one of these. and COMEON – we know it’s a lotta butter and suga which is not good for health 😉 — sigh the cost of loving these two. Blogging and trying different recipes – led to sharing them with friends and with colleagues at work – which led to these disappearing in no time – which led to trying more – which then led to a mission – blogging pound cakes and brownies! Yes, I have just taken it as mission to try every recipe of these two that appeal to me (I wonder if any that wont!!! – no don’t see that happening).
So – here is the first one to this mission. Sour cream pound cake – I had butter, sour cream was dying to be used and wanted to use lime zest and that’s how I chose to make a sour cream pound cake!

This is what you need:
1 cup sour cream – room temp
1 stick butter, softened – room temp
1 cup granulated sugar
3 large eggs – room temp
1.5 cups all-purpose flour
1 tablespoon vanilla extract
zest of 1 lime (this is optional – but I’d say add it… the cake is so so tasty with the hint of the zest.

This is how you make:
Steps:
– Preheat oven to 325*
– Generously spray a loaf pan with non stick cooking spray. use parchment paper if you’d like to.
– In a mixing bowl cream butter and sugar until blended smooth. Add sour cream and blend till smooth and fluffy, about 2-3 minutes.
– Now add eggs one at a time, and keep beating till they incorporate in the batter. Add the flour, vanilla extract and lime zest and beat for about 2-3 mins.
-Pour into the loaf pan. Bake at 325*F for 1 hour . Check for doneness at 1 hour. A toothpick inserted into center of cake will come out clean.

It was very tasty and the hint of lime zest – was very very refreshing. The texture is dense and so it is filling and may be heavy if eaten more than 2 slices at a time – so space out when you want to eat this 😛


Here is wishing me luck on my ‘fun’ mission!
Carpe Diem

I am seding this recipe to BAKE FEST @ ZESTY PALETTE hosted by Vardhini

Chocolate Souffle Torte


Chocolate recipe exchange – all the motivation I needed :). As this is a very FIRST participation from my blog I was very excited to try out something new from the so many books on baking that I have collected over the past 12 months. My rule of thumb when going thru a recipe is drop the recipe if I don’t have a max of 3 ingredients from it that can’t be substituted or don’t have them at all. Who would want to run at the 11th hour when you bake past midnite. Luckily this one had just 2 substitutes – and honestly I really dint want to mess around with Alice Medrich’s recipe… that’d be a sin in a chocolate lover’s world!!! When going thru this recipe I knew I had to try it – a ready list of ingredients available at home and an awesome opportunity to share. So let’s get started 🙂

This is what you need
1/4 cup blanched almonds
3 tablespoons all-purpose flour
3 ounces bittersweet or semi sweet chocolate – chopped fine
1 cup sugar
1/2 cup unsweetened dutch process cocoa
1/2 cup boiling water
2 egg yolks – at room temp
1 tablespoon brandy
4 egg whites – at room temp
scant 1/4 teaspoon cream of tartar

This is how you make
1. Position the rack in the lower third of the oven and preheat to 375*F. Generously spray a 10-inch springform pan with non stick cooking spray or a rectangular pan. use parchment paper if you’d like to.
2. In a food processor or blender, grind the almonds with the flour until very fine. Set aside.
3.Combine the chopped chocolate, cocoa, and 3/4 cup of the sugar in a large mixing bowl. Pour in the boiling water and whisk until mixture is smooth and chocolate is completely melted. Whisk egg yolks and brand. Set aside.
4. Combine the egg whites and cream of tartar in a medium mixing bowl. Beat on medium speed until soft peaks form, Gradually sprinkle in the remaining sugar and beat on high speed until stiff but not dry.
5. Whisk the flour and almonds into the chocolate mixture. Fold the egg whites (in batches of 2-3) into the chocolate mixture.Scrape the batter into the pan.
6. Bake for 30 to 35 minutes, or until a toothpick or wooden skewer inserted into the center comes out with a few moist crumbs clinging to it. Cool in the pan on a wire rack. Torte will sink like a souffle’.Slide a knife around the edges of the pan and carefully release the torte from the pan.
7. Now my dear friends – serve it with dusted sugar, a side of whipped cream or just as it is – have it the way you want it. 🙂

I followed the directions to the [T] and was very very pleased. It is so rich, moist and light. I did substitute Brandy with 2 tablespoons of Kahlua Coffee Cream – and cream of tartar with a few drops lemon. The Kahlua gave coffee richness to this torte which I am a big fan of (Coffee and Chocolate for a me are a perfect pair for any day of my life!!!)


Fun isn’t it 🙂 – want to have more fun?? Come join the fun at the My Baking Addiction and GoodLife Eats Holiday Recipe Swap sponsored by Scharffen Berger.

Carpe Diem!

Murgh Malai –

is chicken marinated in cheese and whip cream and served on a bed of white rice. My husband had been requesting this dish for quite some time and giving me vague specs on how the consistency should be!!! it should be creamy, not sweet and he definitely dint want yoghurt in this dish. Based on these specs, I developed a frame of this recipe and crossed my fingers and toes before I served it for dinner.
The verdict – I must say was very rewarding ;).

This is what you need:
1 Kg Chicken
2 tablespoons ginger garlic paste
1 cup grated cheese (I used mozzarella)
1/2 cup heavy whip cream
1 tablespoon lime juice
1 tablespoon garam masala powder
Salt to taste
1/2 teaspoon turmeric powder
1/2 teaspoon red chilli powder
1 medium onion sliced
1 medium onion thinly chopped
1 medium tomatoes
3-4 slit green chillies
2-3 dry red chillies
1 teaspoon cumin seeds
1 tablespoons cashew paste (optional)
teaspoon of chopped almonds for garnish

This is how you make:

Step 1: Mix together the ginger garlic paste, turmeric powder, garam masala, lime juice, red chilli powder, cheese, whip cream and salt. Add the chicken and mix well. Set aside to marinate for one hour, preferably in a refrigerator.

Step 2: Heat 2 tablespoons of oil in a deep pan. Saute cumin seeds, sliced onions and green chillies till onions turn translucent. Cool and grind to a smooth paste.

Step 3: Now in the same pan heat a tablespoon of oil and add the red chillies, chopped onion and tomatoes. Saute till tomatoes turn pulpy. Add the ground paste and stir well. Saute over low heat for 3-4 minutes.

Step 4: Add the chicken, mix well and cook till the chicken is tender. Add cashew paste and simmer for 2-3 minutes. Garnish with chopped almonds and serve hot.


So your husband wants a very very creamy gravy! – Marinate it in cheese and fresh cream… and then run on the treadmill!

Kori Ghassi…

is a (popular) Mangalorian chicken curry. what made me try this dish was its key ingredient – COCONUT. It is made in coconut oil, has coconut paste in it and in the end you stir in coconut milk (that’s three much of coconut).And if you want to try a recipe that does not shout out for garam masala and is still a tasty gravy, then you must try this for sure… so here is the recipe.

recipe source – Sanjeev Kapoor’s – Dakshin Delights

This is what you need:
1 Kg Chicken
2 tablespoons coriander seeds
1 teaspoon cumin seeds
1 teaspoon mustard seeds
10 dried red chillies
8 black peppercorns
1 cup grated coconut
10 garlic cloves
2 medium onions sliced
2 tablespoons coconut oil
10-12 curry leaves
2 medium tomatoes
salt to taste
1 cup coconut milk
2 tablespoons chopped fresh coriander

This is how you make:

Step 1: Dry-roast the coriander seeds, cumin seeds, mustard seeds, red chillies, peppercorns and coconut one by one and set aside to cool. Add the garlic and one-fourth of sliced onions to the roasted ingredients and grind to a fine paste.

Step 2: Heat the coconut oil in a deep pan. Add the remaining onions and curry leaves and saute till golden brown. Add the tomatoes and sale and saute for 2-3 minutes, or till the tomatoes turn pulpy.

Step 3: Add the chicken and saute for 2-3 mins. Add the ground past and mix well. Cover and cook over medium heat till the chicken is tender.

Step 4: Stir in the coconut milk and adjust seasoning. Simmer for 2-3 minutes.

Step 5: Garnish with fresh coriander and serve hot.
Serve hot with steamed rice or any Indian bread and Enjoy!

CFC Brownies with a hint of coffee

A BROWNIE addict, enthusiast and/or a freak is left with only one choice when they come across a recipe that is promising in more than one ways –  to be cakey, fudgy and chewy (CFC !!!!) And the choice we brownie addicts have is to BAKE’em, Eat’em and maybe Share’em

Here is a link to the recipe – I did alter it a bit by subsitituting 2 ounces unsweetened chocolate with unsweetended cocoa powder and added a teaspoon of instant coffee 😉 (I just love the hint of coffee in my brownies) http://www.mybakingaddiction.com/amazing-brownies-a-giveaway/

I call them CFC brownies and they did live upto their name.

Carpe Diem 🙂

Cave Point is a BEAUTY – you gotta see it to believe it.

This place is so so scenic and natural, untouched with any iota of artificiality. You want to take some timeout from all that’s happening around – Go there!!! You wont regret it a bit. The surroundings are so much at harmony with each other. Water, Rocks, Trees, Sunshine, Rain – this place offered everything it had when we went there… and all for free – unconditionally free (With this economy – anything free is Good — but this was BEAUTIFUL). I love finding and visiting these place which are on their own and worth a find and they leave an impression of their being for a lifetime.This is exactly how I’d describe Cave Point (Door County, WI)

It offers one of the best views (I must admit that I have not seen the others) of Lake Michigan.This place can be missed very easily as it is not much talked about – it was suggested to us by a cashier at a local gas station in Door County, WI. We went with the suggestion and followed all the directions we were given to see this AMAZING PLACE!!!! It made our labor day vacation a real memorable one.

Carpe Diem!